

|
STEP SIXTEEN FINAL ASSEMBLY  Now comes the home stretch! Here’s where all those marking come into play. Take the marked and cut material and slide in under the clamping arm of your new Bending Brake. Hold or clamp firmly with a C-clamp to prevent sliding. Align the marks with the outside edge of the clamping arm. Grasp the handle and pull upward gently but firmly. This creates a permanent fold line in your material. Put folds in all 17 bases.  STEP SEVENTEEN Retrieve the larger of the two desk assembly pieces and fold it using the Bending Brake. 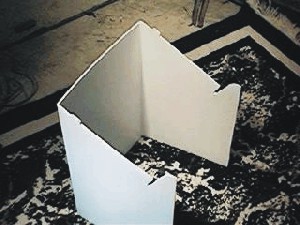 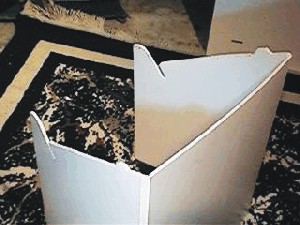 STEP EIGHTEEN Now, get your Contact Cement (use no substitutes!) Apply Contact to the 3” x 24” area of the large piece and the 3” x 24” area of the small piece.  STEP NINETEEN Let the cement dry at least 20 minutes. Then flip one of the pieces over and firmly press cemented area to cemented area.   STEP TWENTY Here is the almost completed desk assembly. Look at the edge detail in the photo belowt.  |
THE MUSICIANS | OUR MUSIC| LISTEN | BOOK THE BAND! CONTACT US
JOIN UP! PLANNING YOUR EVENT| SCHEDULE| WEDDING RECEPTIONS| NEWS | LINKS
Contents Copyright © 2008 by NC REVELERS ORCHESTRA