

|
STEP TWENTY-ONE
Get your hole punch jig and place it on a sturdy surface (we used a garage floor). Take one of the desk assemblies and slide it into the corner as shown. 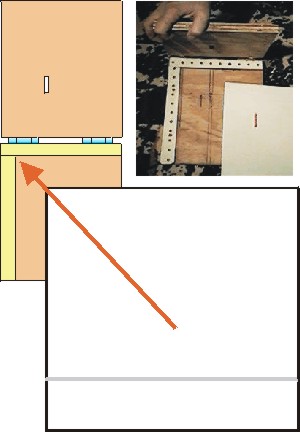 Flip the top over, sandwiching the desktop between the top and bottom of the jig. Using the two chisels and an appropriate hammer...insert the chisel through the guide-hole in the top face of the jig. Using the sides of the plywood jig as your guide, insert the larger of the two chisels into the jig hole 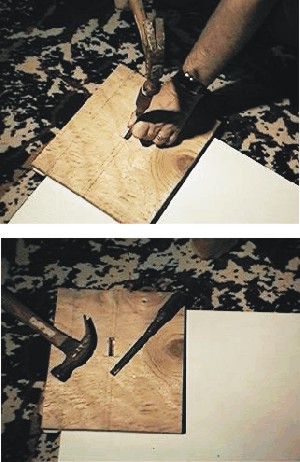 and make punch-cuts on both sides of the guide that will be the length of the hole...then, using the smaller of the two chisels, repeat the process on the other two (short) sides to cut the width of the hole. When you've finished punching the hole in one side, then flip the sheet over, insert the opposite corner, and repeat the process. Do this for all 17 desktops. A J. J. Johnson album, full blast, will alleviate the boredom! and make punch-cuts on both sides of the guide that will be the length of the hole...then, using the smaller of the two chisels, repeat the process on the other two (short) sides to cut the width of the hole. When you've finished punching the hole in one side, then flip the sheet over, insert the opposite corner, and repeat the process. Do this for all 17 desktops. A J. J. Johnson album, full blast, will alleviate the boredom! STEP TWENTY-THREE Now for a few finishing touches. Take the small 1.5" x 6" strips you previously cut. Cement two of them together to make a double thickness. 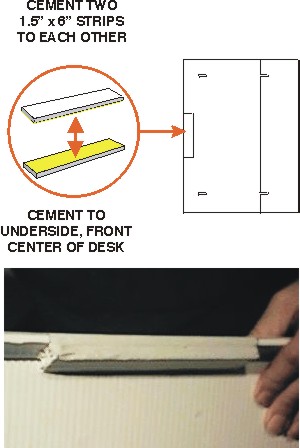 The resulting piece should be cemented to the top, front center of the desktop's underside. This will serve two functions" 1. It will act as a lip to prevent the front of the stand from bowing under the weight of a heavy book of music. Second, it provides a sturdy base on which to clamp a stand light. The resulting piece should be cemented to the top, front center of the desktop's underside. This will serve two functions" 1. It will act as a lip to prevent the front of the stand from bowing under the weight of a heavy book of music. Second, it provides a sturdy base on which to clamp a stand light. STEP TWENTY-FOUR You can use white duct tape to cover up the rough edges of this lip...AND...the vertical edge of the desk as well (that's the part where the two original pieces that make up the desk were cemented together...SEE PHOTOS).  Slide the top onto the base by aligning the slots. 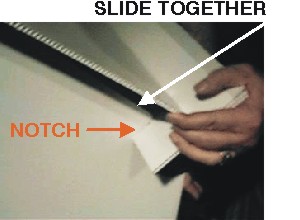 Now... insure the face of the base is securely tucked behind the lip...and there you have it! A finished stand! It took us 8 hours (far less than it took me to do these plan pages! Don't ask how long THAT took!) While we use these stands for rehearsals, multiple other bands we know of have had the fronts decorated with their logos, and they use them for performance. Use your imagination! How much did all this cost? Not including the cost of our labor for 8 hours, each stand cost us just under $10.00! Depending on your source of supply, your cost could be a bit more or less... but the final price should be fairly close  to what we experienced. No guarantee can be offered... do your own math first!
You're on your own!! If you have any questions, send an e-mail to Henry Mason These plans are COPYRIGHT © 1999 by H. Bourg Designs, and H.C. Mason. You are free to use these plans for music stands for your band. You are not permitted to reproduce these plans on any other website, or by any other method of publication, print or electronic, for any reason whatsoever. You may link to these plans if you desire, by addressing your link to "www.revorch.com," and directing followers of the link to the NavBar button marked "Resources" on our "Index" page.Your cooperation is appreciated. The names "Coroplas" and "Contact Cement" are the property of their respective corporate owners. No warranty of any kind is expressed or implied. |
THE MUSICIANS | OUR MUSIC| LISTEN | BOOK THE BAND! CONTACT US
JOIN UP! PLANNING YOUR EVENT| SCHEDULE| WEDDING RECEPTIONS| NEWS | LINKS
Contents Copyright © 2008 by NC REVELERS ORCHESTRA